
Frequently Asked Questions
Create an Account on SyncroIQ
Use this quick, visual guide to sign up. Follow the steps and screenshots below.
-
Go to syncroiq.com.

Homepage entry point. -
Open Pricing → choose your product (e.g., Landlord).

Open the pricing for your role. -
Scroll to pricing or click Start a free account today.

Free account entry point. -
Click Add to cart.

Add the plan to your cart. -
Click Proceed to Checkout.

Move to checkout. -
(Optional) Tick the updates/marketing checkbox.

Stay informed if you like. -
Enter your Email address.

Your primary contact. -
Complete the contact info fields.

Contact information section. -
Confirm your Email address entry.

Double‑check typos. -
Enter your Billing details.

Billing information. -
Click Place Order.

Finalize checkout. -
Check your email to verify your address.

Email verification message. -
After verifying, you'll see confirmation that your email is confirmed.

Confirmation screen. -
When your account is ready, you'll get an email to set your password and access your account.

Final onboarding email.
How to Create an Appointment in SyncroIQ
Follow these numbered steps with screenshots to schedule your appointment.
-
Go to the sidebar navigation menu.
-
Click “Appointments”.

Open the Appointments module from the left menu. -
Click “Create Appointment”.

Start creating a new appointment. -
Select the person you want to meet with.

Choose the staff/host for the meeting. -
Select the Tenant/Resident (yourself).

Pick who the appointment is for. -
Choose In‑Person, Phone, or Video Call.
This determines how you’ll meet.
-
Select the meeting type you prefer.

Pick in‑person, phone, or video. -
Add a Subject/Topic.

Give the meeting a clear title. -
(Optional) Add a description or details.

Provide context if needed. -
Click the Date field and choose a date.

Choose the appointment day. -
Click the Time field and pick a time.

Pick an available slot. -
Click Create.

Save the appointment. -
Click OK to confirm.

Confirmation dialog.
How To Filter My Appointments
Use these steps and screenshots to narrow down your appointments by status, location, and dates.
-
Go to the sidebar navigation menu.
-
Click “Appointments”.

Open the Appointments module. -
Click “My Appointments”.

Switch to your personal appointments list. -
Click “Filters”.

Open the filter panel. -
Status options
Open, Accepted, Completed, Missed, Cancelled, or All.
-
Select a Status.

Pick the appointment status to filter by. -
Location options
In‑Person, Phone Call, or Video Conference.
-
Select a Location.

Filter by how the meeting occurs. -
Click the From Date field.

Choose the start date. -
Click the To Date field.

Choose the end date. -
Click Apply Filters.

Apply the selected criteria to your list.
Export My Appointments as CSV File
Download your appointments in spreadsheet format for backup or reporting.
-
Go to the Appointments tab.

Navigate to the Appointments section. -
Click on My Appointments.

View your personal appointment list. -
Click the Export CSV button in the top-right corner.

Download the CSV file of your appointments.
How to Create a New Billing
This guide provides a step-by-step process for creating a new billing on the SyncroIQ platform.
-
Go to the Sidebar Navigation Menu
Access the main navigation menu to begin the billing creation process.

Navigate to the sidebar navigation menu. -
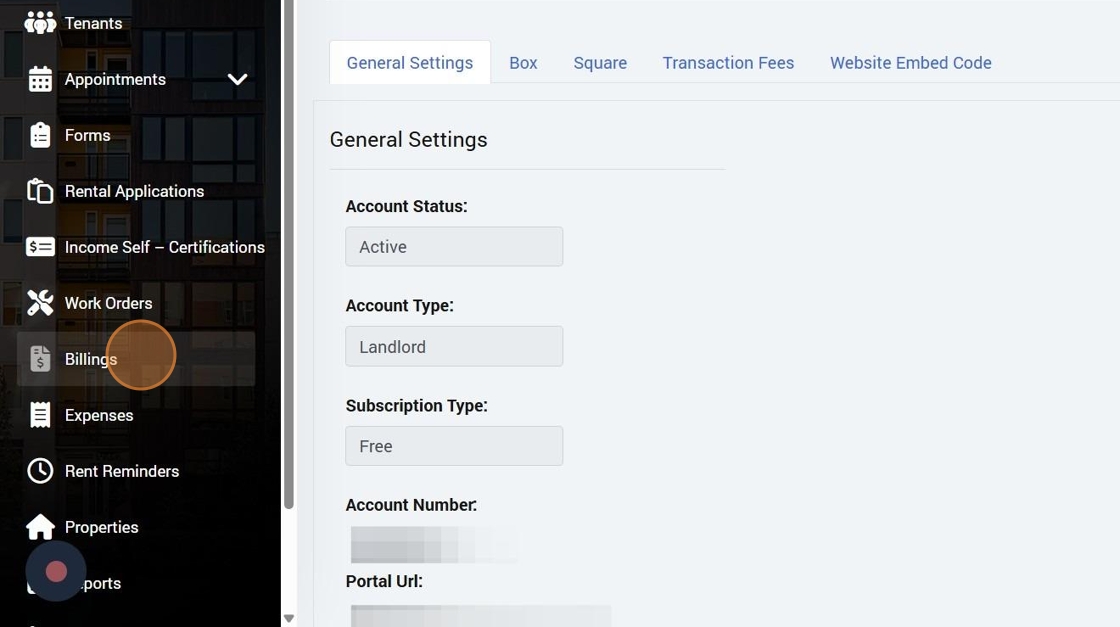
Click Billings
Open the Billings module from the sidebar.
Select the Billings option from the sidebar. -
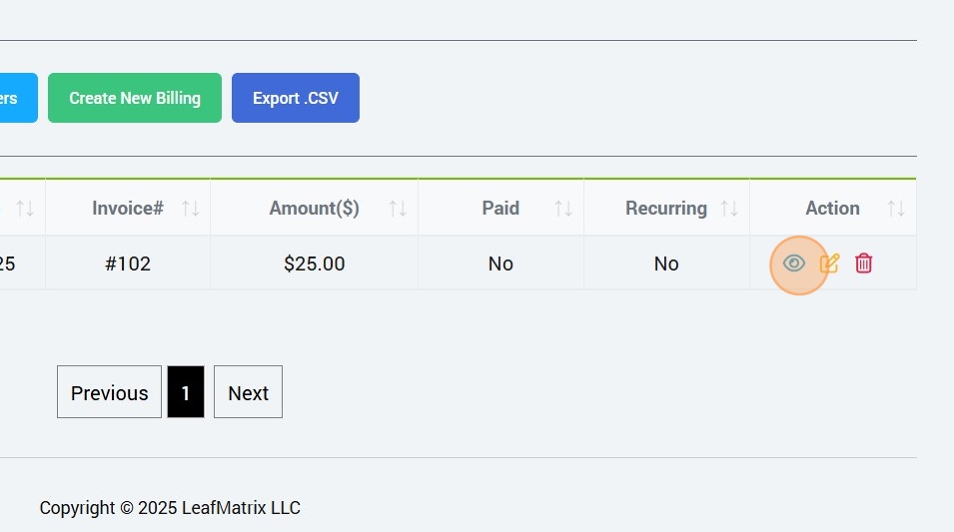
Click the Create New Billing button
Initiate the creation of a new billing entry.

Click the button to start creating a new billing. -
Select a Billing Type
Choose from options such as Rent, FlexSpace Security Deposit, FlexSpace Rental Fee, Security Deposit, Work Order, Form, or Pet Deposit.

Select the appropriate billing type from the dropdown. -
Enter a Billing Amount
Specify the amount for the billing.

Input the billing amount in the provided field. -
Select who to send the bill to
Choose the recipient of the billing.

Select the recipient for the billing. -
Add a description if necessary
Include any relevant details or notes for the billing.

Enter a description for the billing if needed. -
Enter a Due Date
Set the due date for the billing payment.

Specify the due date for the billing. -
Click Recurrence Options
Configure recurrence settings if the billing is recurring.

Access recurrence options to set up recurring billing. -
Click Advanced Options
Explore additional settings for the billing.

Click to configure advanced billing settings. -
Configure Reminder, Recurrence, or Advanced Options
Set additional settings as needed for reminders or recurrence.

Adjust settings for reminders, recurrence, or advanced options. -
Click Create
Finalize the billing creation process.

Click Create to generate the new billing. -
Click OK
Confirm the creation of the billing.

Click OK to confirm and complete the billing creation.
How to Take a Credit or Debit Card Payment
Process a one-time credit or debit card payment in SyncroIQ as an admin.
-
Open your dashboard and show the sidebar
Sign in to SyncroIQ and make sure the left sidebar navigation is visible.
Start from your SyncroIQ dashboard. -
Click Billings
Open the Billings section from the sidebar. -
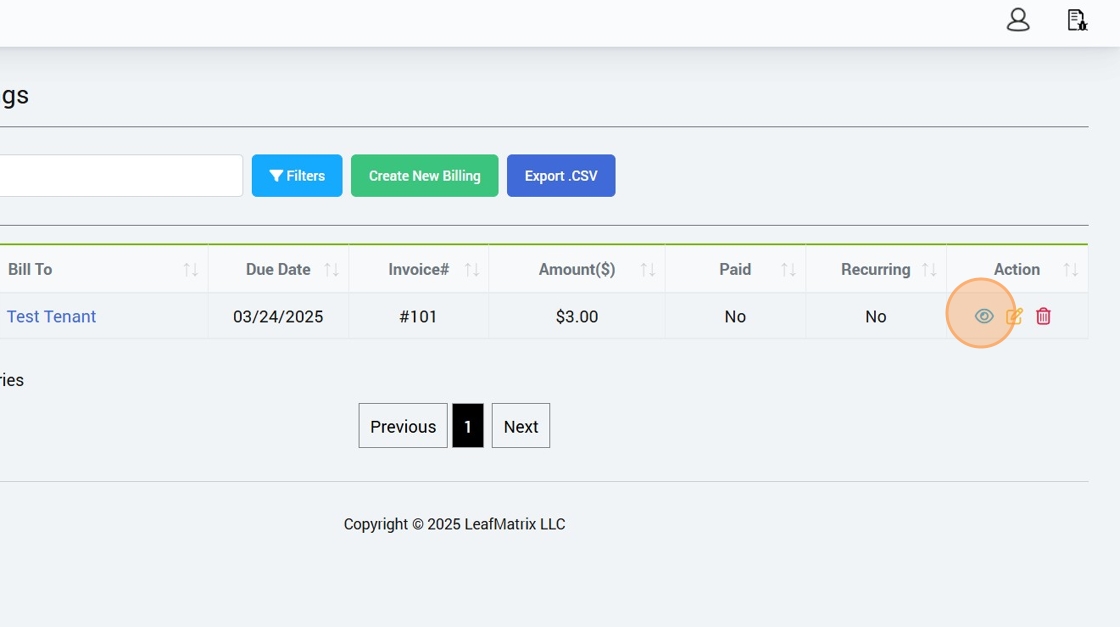
Find the billing record and click View Details
Use filters if needed, then open the billing’s details. -
Click Add Payment
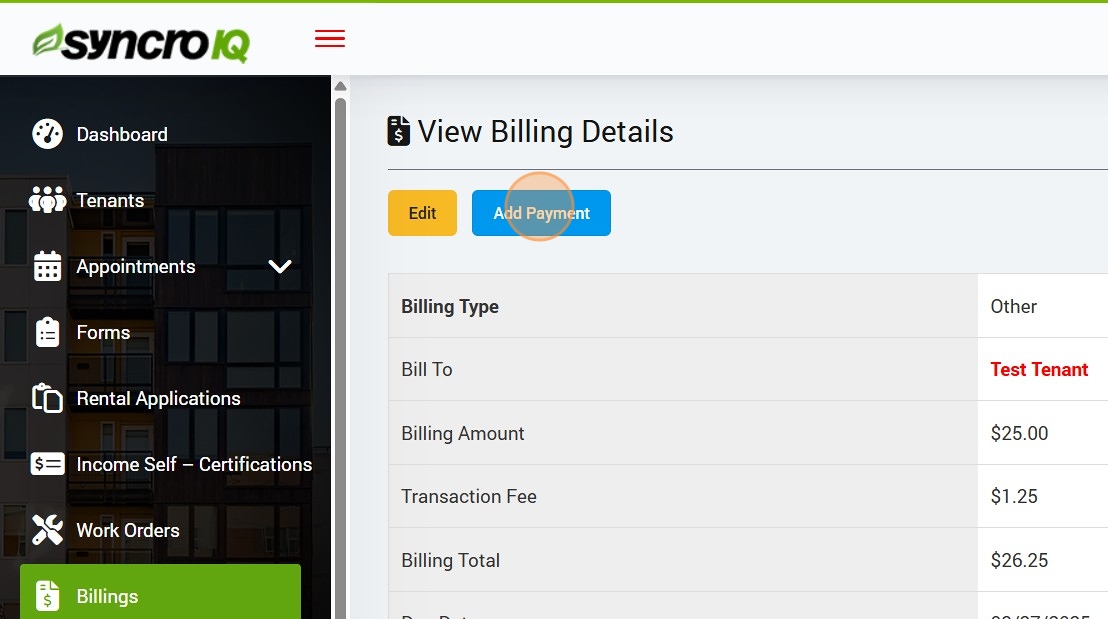
Start adding a new payment to this billing. -
Select Credit or Debit Card as the payment method
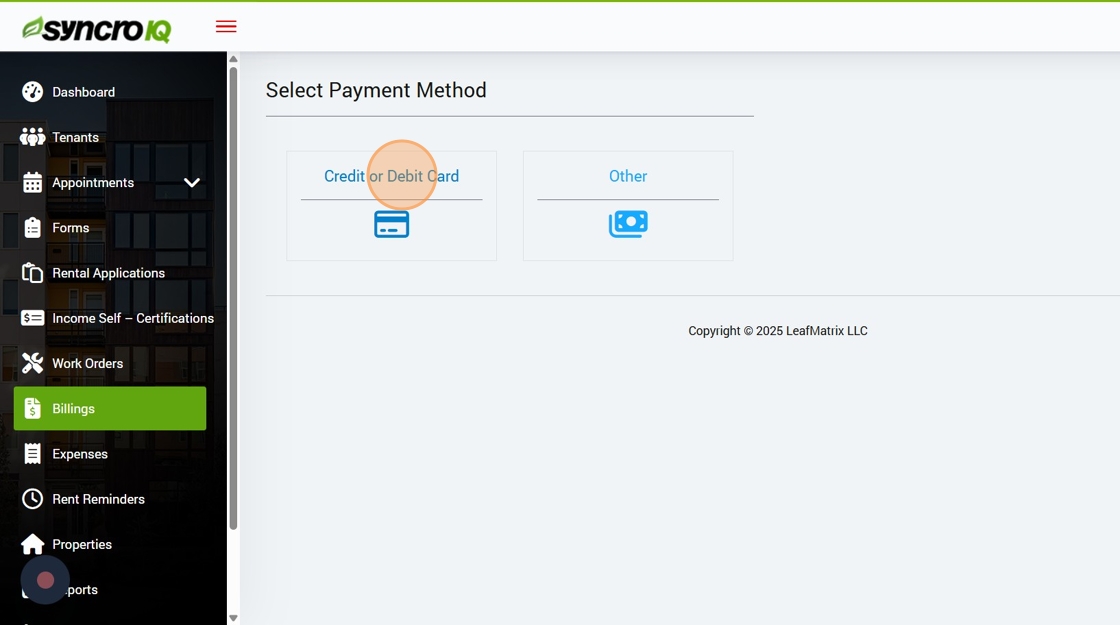
Choose the card option for payment. -
Enter the card details
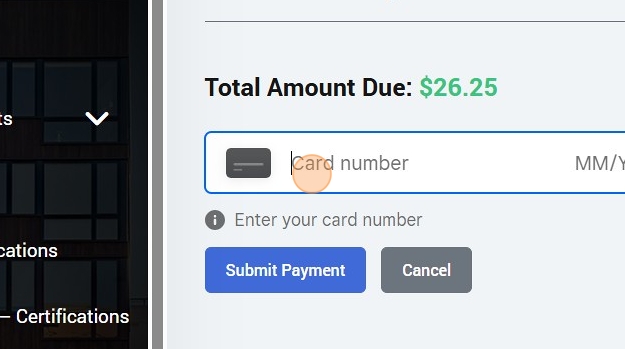
Fill in card number, expiration, and security code. -
Click Submit Payment
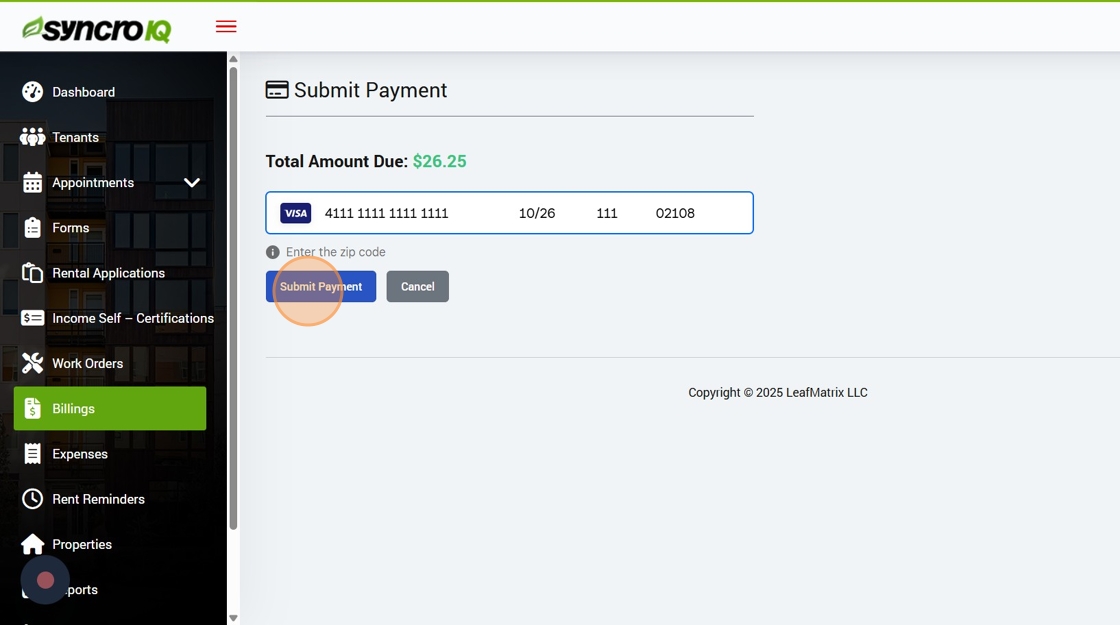
Process the card payment. -
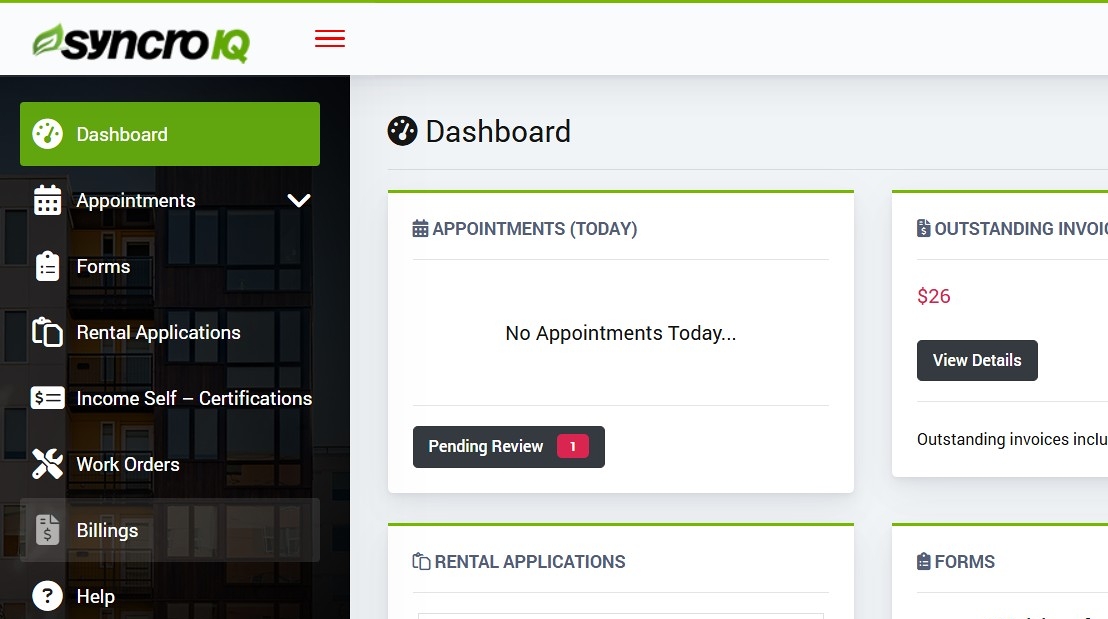
Done! Payment recorded
You’ll see the payment added to the Billing record.
How to Make a Payment
This guide provides a straightforward process for paying invoices on the SyncroIQ platform. End-users can satisfy invoices using a Credit Card, Debit Card, ACH Bank Transfer, Google Pay, Apple Pay, or CashApp.
-
Sign into your SyncroIQ account and open the sidebar navigation menu
Sign into SyncroIQ and access the main navigation. -
Click Billings

Open the Billings module from the sidebar. -
Find the billing item using the filter options. Click Pay Now

Filter or search to locate the correct billing, then click Pay Now. -
Select an available Payment Method

Choose the desired payment method to proceed. -
Enter the card details
Card number, expiration date, CVV, and cardholder name.

Fill in the required card fields accurately. -
Click Submit Payment

Process the transaction and record the payment.
How to Record External Payments
This guide provides a straightforward method for recording external payments using the SyncroIQ billing feature. External payments are payments that account admins manually enter, such as Cash, Check, Zelle, Venmo, and Money Orders.
-
Sign into your SyncroIQ account and open the sidebar navigation menu
Access your SyncroIQ account and navigate to the sidebar menu to begin the payment recording process.

Sign in and open the sidebar navigation menu. -
Click Billings
Open the Billings module from the sidebar.

Select the Billings option from the sidebar. -
Find the Billing item using the filter options
Use the filter options to locate the specific billing item and click the View Details icon.
Use filters to find the billing item and click View Details. -
Click Add Payment
Initiate the payment recording process by selecting the Add Payment option.

Click Add Payment to proceed with the payment process. -
Click the Other payment method
Choose the Other payment method to record external payments such as Cash, Check, Zelle, Venmo, or Money Orders.

Select Other as the payment method for external payments. -
Enter the Paid Date
Input the date the external payment was received.

Enter the Paid Date for the external payment. -
Select one of the Payment Method options from the dropdown
Choose the specific payment method (e.g., Cash, Check, Zelle, Venmo, or Money Order) from the dropdown menu.

Select the appropriate Payment Method from the dropdown. -
Click Submit Payment
Finalize the recording of the external payment by submitting the entered details.

Click Submit Payment to complete the transaction.
How to Filter Billings
This guide provides a straightforward method for filtering billings in SyncroIQ to locate specific billing items efficiently.
-
Go to Sidebar Navigation Menu
Access your SyncroIQ account and open the sidebar navigation menu to start the filtering process.
-
Click “Billings”
Open the Billings module from the sidebar.

Select the Billings option from the sidebar. -
Click “Filters”
Access the filter options to refine your billing search.

Click Filters to open the filtering options. -
Billing Type Options
Tip: Rent, FlexSpace Security Deposit, FlexSpace Rental Fee, Security Deposit, Work Order, and Pet Deposit are the options for Billing Type.
-
Click the Billing Type Dropdown
Select the desired billing type from the dropdown menu.

Select the billing type from the dropdown. -
Click the “Due Date (Start)” Field
Input the start date for the billing due date range.

Enter the Due Date (Start) for the billing filter. -
Select a “Due Date (End)”
Choose the end date for the billing due date range.

Select the Due Date (End) for the billing filter. -
Select a “Payment Method”
Choose the payment method to filter billings.

Select the Payment Method from the dropdown. -
Select if Bill Was Paid or Not
Filter billings based on whether they have been paid.

Select the paid or unpaid status for the bill. -
Select a Person to Pay the Bill To
Choose the recipient of the bill payment.

Select the person to pay the bill to. -
Select Whether or Not the Bill is Recurring
Filter billings based on whether they are recurring or one-time.

Select whether the bill is recurring or not. -
Click on “Apply Filter”
Apply the selected filters to display the relevant billing items.

Click Apply Filter to view the filtered billings.
How to Export Billings Data as CSV
This guide provides a straightforward method for exporting billings data as a CSV file in SyncroIQ for easy data management and analysis.
-
Go to Sidebar Navigation Menu
Access your SyncroIQ account and open the sidebar navigation menu to begin the export process.
-
Click “Billings”
Open the Billings module from the sidebar.

Select the Billings option from the sidebar. -
Click “Export .CSV”
Click the Export .CSV button to download the billings data as a CSV file.

Click Export .CSV to download the billings data.
How to Create an Expense
This guide provides a step-by-step method for creating an expense in SyncroIQ to manage your financial records efficiently.
-
Go to Sidebar Navigation Menu
Access your SyncroIQ account and open the sidebar navigation menu to start creating an expense.
-
Click “Expenses”
Open the Expenses module from the sidebar.

Select the Expenses option from the sidebar. -
Select an “Expense Type”
Choose the appropriate expense type from the available options.

Select the expense type for your record. -
Select a “Vendor”
Choose the vendor associated with the expense.

Select the vendor for the expense. -
Enter an “Amount” in Dollars
Input the expense amount in dollars.

Enter the expense amount in dollars. -
Enter a “Due Date”
Specify the due date for the expense.

Enter the due date for the expense. -
Select if the Expense is Billable or Not
Indicate whether the expense is billable or not.

Select whether the expense is billable. -
Add a Description if Necessary
Include a description for the expense if needed.

Add a description for the expense if necessary. -
Select Related Items and Reminder, Recurrence, or Advanced Options
Choose related items and configure reminder, recurrence, or advanced settings as needed.

Select related items and configure additional settings. -
Click “Create”
Click the Create button to generate the expense record.

Click Create to generate the expense record. -
Click “OK”
Confirm the creation by clicking OK in the confirmation dialog.

Click OK to confirm the expense creation. -
Verify the Expense Details
Review the expense details to ensure accuracy.

Verify the expense details for accuracy.
How to Filter Expenses
This guide provides a step-by-step method for filtering expenses in SyncroIQ to efficiently manage and review your financial records.
-
Go to Sidebar Navigation Menu
Access your SyncroIQ account and open the sidebar navigation menu to begin filtering expenses.
-
Click “Expenses”
Open the Expenses module from the sidebar.

Select the Expenses option from the sidebar. -
Click “Filters”
Click the Filters button to access the filtering options.

Click the Filters button to open filtering options. -
Select an “Expense Type”
Choose the desired expense type from the available options.

Select the expense type to filter. -
Select if the Expense Has Been Paid or Not
Indicate whether to filter for paid or unpaid expenses.

Select whether the expense is paid or unpaid. -
Select Whether the Expense is Billable or Not
Choose whether to filter for billable or non-billable expenses.

Select whether the expense is billable or non-billable. -
Select a “Start Date”
Specify the start date for the expense filter range.

Select the start date for the filter range. -
Select an “End Date”
Specify the end date for the expense filter range.

Select the end date for the filter range. -
Select a Property
Choose the property associated with the expenses to filter.

Select the property to filter expenses. -
Select if the Expense Will Be Recurring or Not
Indicate whether to filter for recurring or non-recurring expenses.

Select whether the expense is recurring or non-recurring. -
Click “Apply Filter”
Click the Apply Filter button to apply the selected filters and view the results.

Click Apply Filter to view the filtered expense results.
How to Export Expenses as CSV
This guide provides a step-by-step method for exporting expenses as a CSV file from the SyncroIQ dashboard to manage and analyze your financial records.
-
Go to Sidebar Navigation Menu
Access your SyncroIQ account and open the sidebar navigation menu to begin exporting expenses.
-
Click “Expenses”
Open the Expenses module from the sidebar.

Select the Expenses option from the sidebar. -
Click “Export .CSV”
Click the Export .CSV button to download the expenses as a CSV file.

Click the Export .CSV button to download the expenses.
How to Create a New Property
This guide provides a step-by-step method for creating a new property in the SyncroIQ dashboard.
-
Go to Sidebar Navigation Menu
Access your SyncroIQ account and open the sidebar navigation menu to begin creating a new property.
-
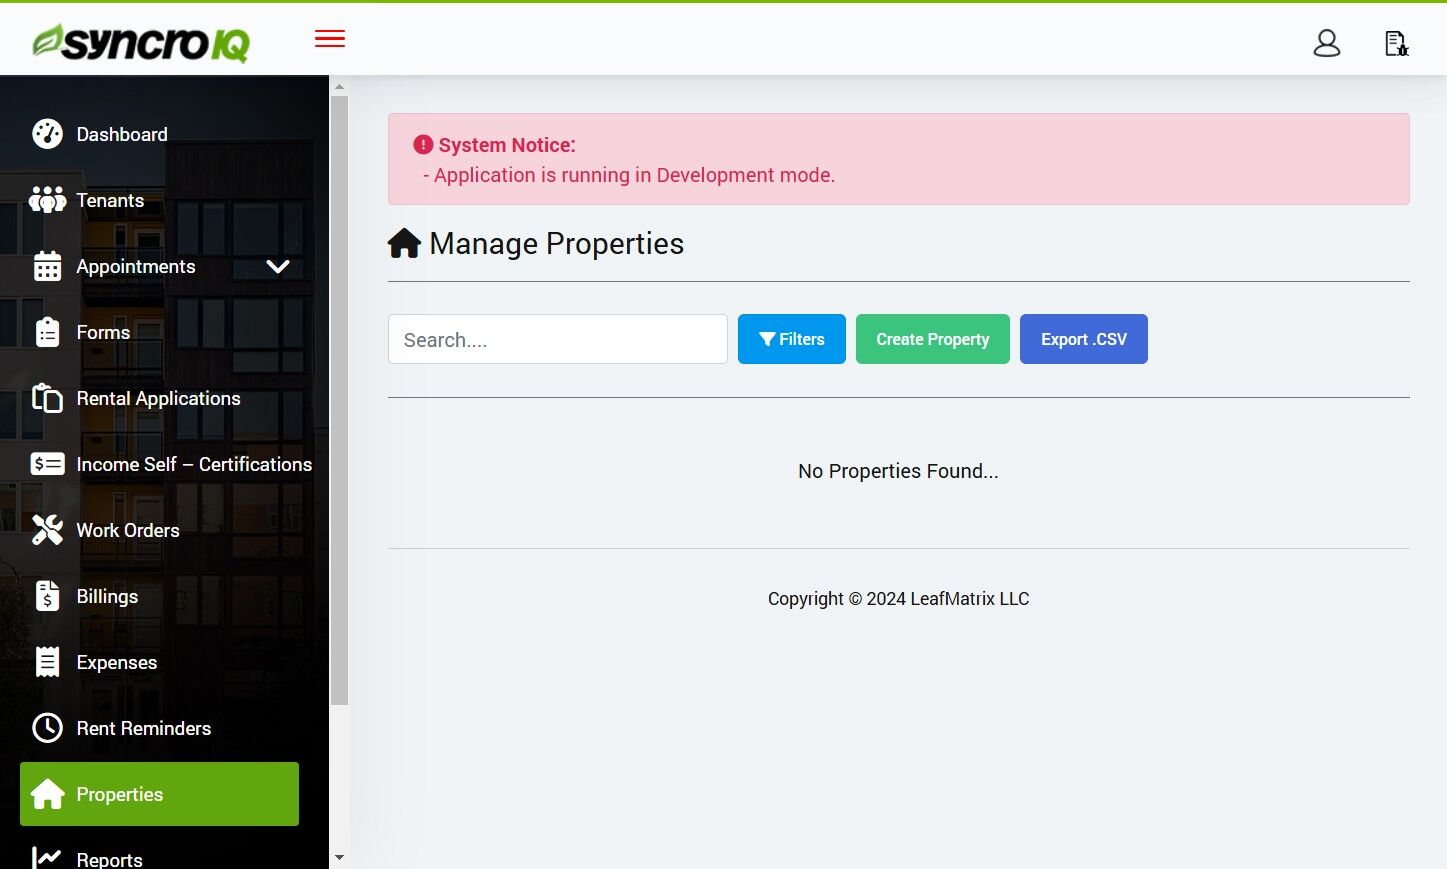
Click “Properties”
Open the Properties module from the sidebar.

Select the Properties option from the sidebar. -
Click on “Create Property”
Click the Create Property button to start adding a new property.

Click the Create Property button to begin. -
Enter a “Name” in the field
Enter the name of the property in the provided field.

Enter the name of the property. -
Select a Type of Property
Choose a property type from the available options: Apartment Complex, Condo, Flex Space, Multi Family, or Single Family.

Select a property type from the dropdown menu. Tip: Apartment Complex, Condo, Flex Space, Multi Family, and Single Family are the options for Type of Property. -
Add Notes if necessary
Add any relevant notes about the property in the provided field, if needed.

Add notes for the property, if necessary. -
Select an Address Type
Choose an address type from the available options: Family, Senior, Private Housing, or Flex Space.

Select an address type from the dropdown menu. Tip: Family, Senior, Private Housing, and Flex Space are the options for Address Type. -
Enter an “Address” in the field
Enter the street address of the property in the provided field.

Enter the street address of the property. -
Enter an “Apt, Suite, etc (optional)” in the field
Enter any apartment, suite, or additional address details in the provided field, if applicable.

Enter apartment, suite, or additional address details, if applicable. -
Enter a “City” in the field
Enter the city of the property in the provided field.

Enter the city of the property. -
Enter a “State/Province” in the field
Enter the state or province of the property in the provided field.

Enter the state or province of the property. -
Enter a “Zip/Postal code” in the field
Enter the zip or postal code of the property in the provided field.

Enter the zip or postal code of the property. -
Click the “Create” button
Click the Create button to save and create the new property.

Click the Create button to save the new property.
How to Filter Forms
This guide provides a step-by-step method for filtering forms in the SyncroIQ dashboard to efficiently manage your documentation.
-
Go to Sidebar Navigation Menu
Access your SyncroIQ account and open the sidebar navigation menu to begin filtering forms.
-
Click “Forms”
Open the Forms module from the sidebar.

Select the Forms option from the sidebar. -
Click “Filters”
Click the Filters button to access the form filtering options.

Click the Filters button to open the filtering options. -
Select a “Form Type”
Choose the desired form type from the available options.
Tip: Available form types include Recert, Direct Deposit, Lease Packet, W-9, Residential Lease, and Rental Agreement.
Select the desired form type from the dropdown menu. -
Select a “Signature Type”
Choose the signature type for filtering your forms.
Tip: Available signature types include Manual Upload and Electronic Signature.
Select the appropriate signature type for the form. -
Select a “Status”
Choose the status to filter your forms.
Tip: Available status options include Pending, Sent, Viewed, Signed, Completed, Cancelled, and Denied.
Select the desired status from the dropdown menu. -
Click the “From Date” Field
Select the start date for the date range to filter forms.

Click the From Date field to set the start date for filtering. -
Click the “To Date” Field
Select the end date for the date range to filter forms.

Click the To Date field to set the end date for filtering. -
Click “Apply Filters”
Click the Apply Filters button to apply the selected filters and view the filtered forms.

Click the Apply Filters button to finalize the filtering process.
How to Export Forms
This guide provides a step-by-step method for exporting forms as a CSV file from the SyncroIQ dashboard.
-
Go to Sidebar Navigation Menu
Access your SyncroIQ account and open the sidebar navigation menu to begin exporting forms.
-
Click “Forms”
Open the Forms module from the sidebar.

Select the Forms option from the sidebar. -
Click “Export .CSV”
Click the Export .CSV button to download the forms data as a CSV file.

Click the Export .CSV button to download the forms data.
How to Filter Income Self-Certifications
This guide provides a step-by-step method for filtering Income Self-Certifications in the SyncroIQ dashboard.
-
Go to Sidebar Navigation Menu
Access your SyncroIQ account and open the sidebar navigation menu to begin filtering Income Self-Certifications.
-
Click “Income Self-Certifications”
Open the Income Self-Certifications module from the sidebar.

Select the Income Self-Certifications option from the sidebar. -
Click “Filters”
Click the Filters button to access filtering options.

Click the Filters button to open the filtering options. -
Select a “Status”
Choose a status from the available options: Draft, Pending, Incomplete, or Complete.

Select a status from the dropdown menu. Tip: Draft, Pending, Incomplete, and Complete are the options for Status. -
Select if it has been Submitted
Choose whether the certifications have been submitted.

Select the submission status. -
Select a “Start Date”
Select a start date in the provided field to filter certifications by date range.

Select a start date for the filter. -
Select an “End Date”
Select an end date in the provided field to complete the date range filter.

Select an end date for the filter. -
Click for all “Applied Filters”
Click to apply all selected filters and view the filtered Income Self-Certifications.

Click to apply all selected filters.
Export Income Certifications (.CSV)
Follow these steps to export “Income Self‑Certifications” to a CSV file for offline reporting and analysis.
-
Open the sidebar navigation menu
Sign in to your SyncroIQ account and make sure the left sidebar is visible.
-
Click Income Self – Certifications

Navigate to the “Income Self – Certifications” section from the sidebar. -
Click Export .CSV

Your CSV file will be generated and downloaded to your device.
How to Create a New Property
Add a new property in SyncroIQ, including name, type, notes, and full address details.
-
Go to the sidebar navigation menu
Open your SyncroIQ dashboard and make sure the left sidebar is visible.
-
Click Properties
Open the Properties section from the sidebar. -
Click Create Property
Start creating a new property record. -
Enter a Name
Add a clear, recognizable property name. -
Select a Type of Property
Options include: Apartment Complex, Condo, Flex Space, Multi Family, and Single Family.
Pick the category that best fits your property. -
Add Notes (optional)
Capture any details or internal notes for your team. -
Select an Address Type
Options include: Family, Senior, Private Housing, and Flex Space.
Choose the address context for the property. -
Enter the Address
Type the main street address. -
Enter Apt, Suite, etc (optional)
Add unit information if applicable. -
Enter the City
Provide the city for this address. -
Enter the State/Province
Select or enter the appropriate region. -
Enter the Zip/Postal code
Add the correct postal code for the property. -
Click Create
Save the new property record. -
Done! Your property is created
You’ll be taken to the property details page where you can manage units, tenants, and more.
Filter Properties
Follow these steps to apply filters and refine your property search in SyncroIQ.
-
Open the Sidebar Navigation Menu
Make sure you're signed in and the sidebar is visible.
-
Click “Properties”
Navigate to the Properties section. -
Click “Filters”
Open the filter panel. -
Select Property Type
Options include: Apartment Complex, Condo, Flex Space, Multi Family, and Single Family.

Choose from available property types. -
Set Active Status
Choose either Yes or No under the “Active” field.

Filter by current active status. -
Select a Parent Property
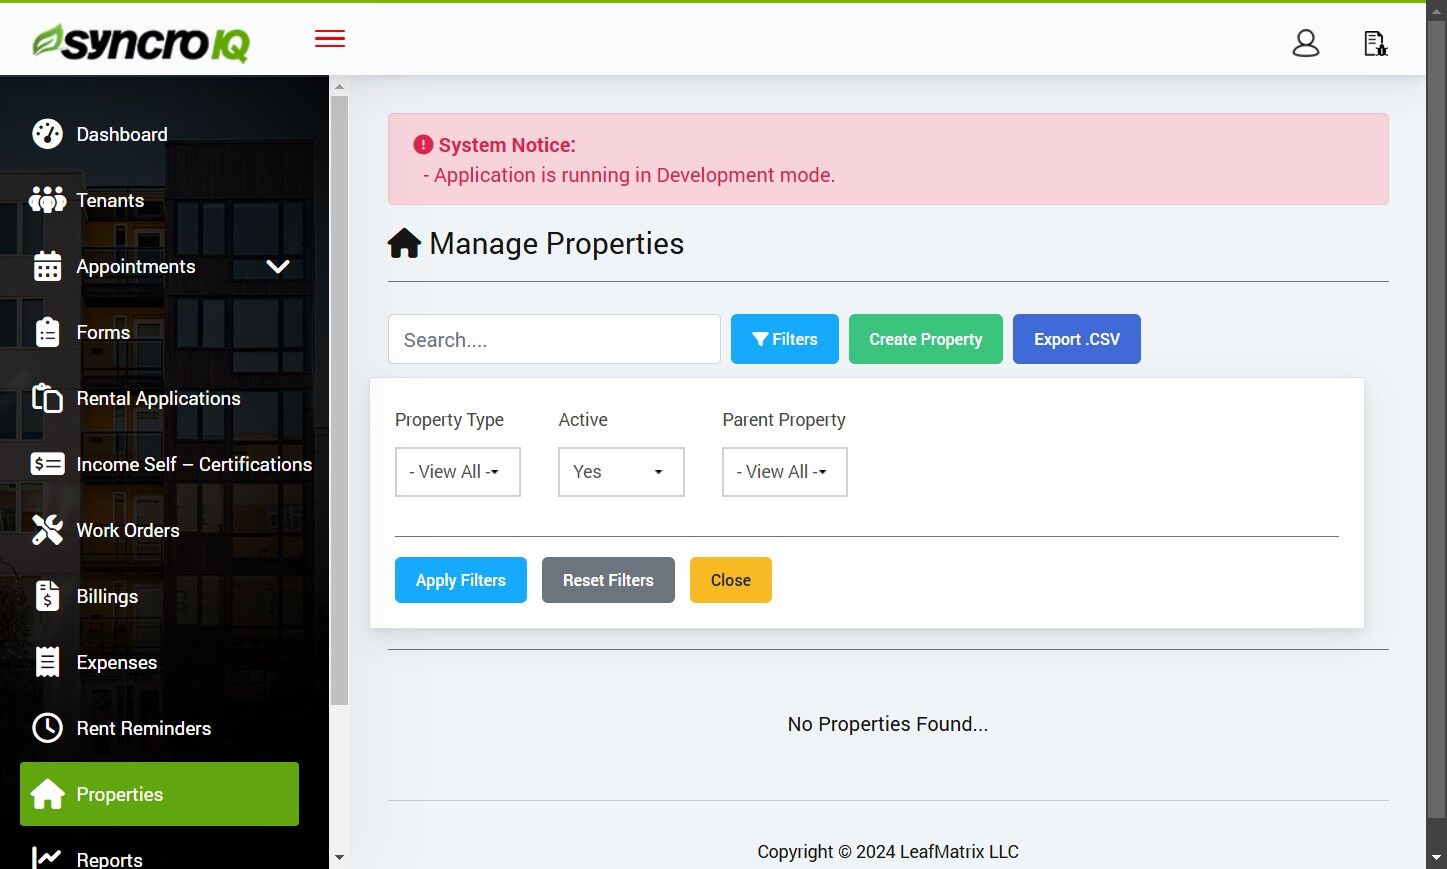
Use the dropdown to select a related property group. -
Click “Apply Filters”

View the filtered list of properties.
Export Properties to CSV
Quickly download your Properties list as a .CSV file from SyncroIQ.
-
Open the Sidebar Navigation Menu
Make sure you’re signed in and the left sidebar is visible.
-
Click “Properties”

Navigate to the Properties section. -
Click “Export .CSV”
This will generate a CSV file of the current Properties list.

Use the toolbar action to export. -
Save the file
Your browser will download a
.csvfile. Open it with Excel, Google Sheets, or any spreadsheet tool.
How to Create Rent Reminders
Follow these steps in SyncroIQ to create automated rent reminders for tenants and other recipients.
-
Open the sidebar navigation menu
Sign in to your SyncroIQ account and make sure the left sidebar is visible.
-
Click Rent Reminders

Navigate to the “Rent Reminders” section from the sidebar. -
Click Create Rent Reminder

Start creating a new rent reminder. -
Select a Reminder Recipient

Choose who should receive the reminder (tenant, payer, or contact). -
Select a Rent Due Date

Set the monthly due date used for reminders. -
Select a Reminder Start Date

Choose when the reminder series should begin. -
Select a Reminder End Date

Specify when reminders should stop. -
Set Enabled to Yes or No

Enable the reminder schedule when ready. -
Set additional Reminders (optional)

Add extra reminder times (e.g., before/on/after due date). -
Click Create

Save your reminder configuration. -
Click OK

Confirm to finalize creation. -
Verify rent reminder details

Double‑check recipients, dates, status, and reminder timings.
How to Filter Rent Reminders
Use the Filters panel in SyncroIQ to quickly narrow the list of rent reminders (e.g., show only active or inactive).
-
Open the sidebar navigation menu
Make sure the left sidebar is visible after you sign in.
-
Click Rent Reminders

Navigate to the “Rent Reminders” page. -
Click Filters

Open the Filters drawer to choose conditions. -
Select Active status
Choose whether to show only active reminders or inactive ones.

Pick the reminder status to filter by. -
Click Apply Filters

Apply your selections to refresh the results.
How to Filter Rental Applications
Use the Filters panel in SyncroIQ to narrow the list of rental applications by status and date range.
-
Open the sidebar navigation menu
Make sure the left sidebar is visible after you sign in.
-
Click Rental Applications
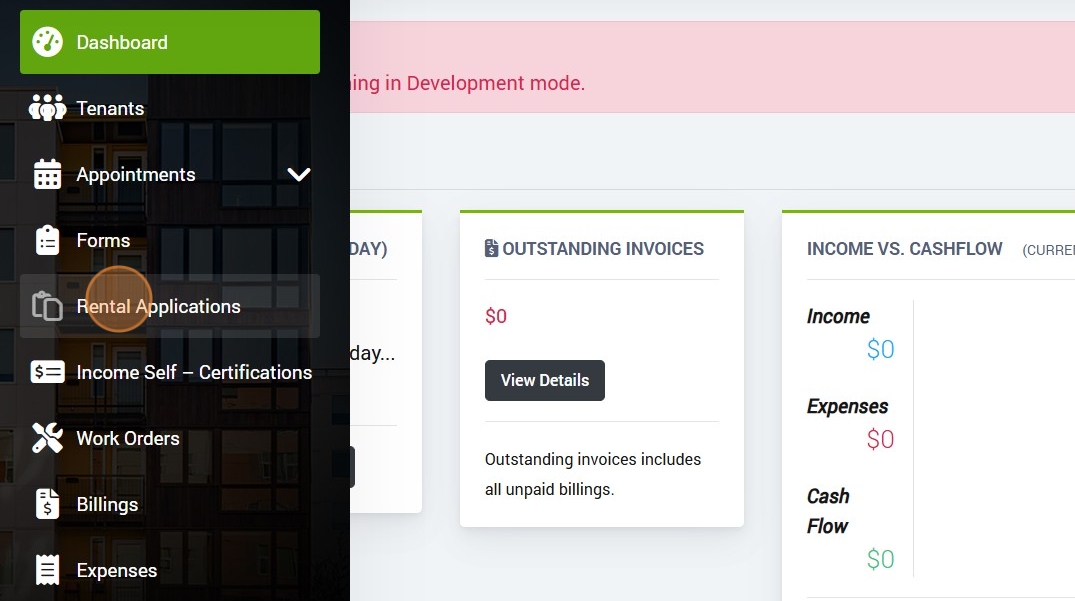
Navigate to the “Rental Applications” page. -
Click Filters
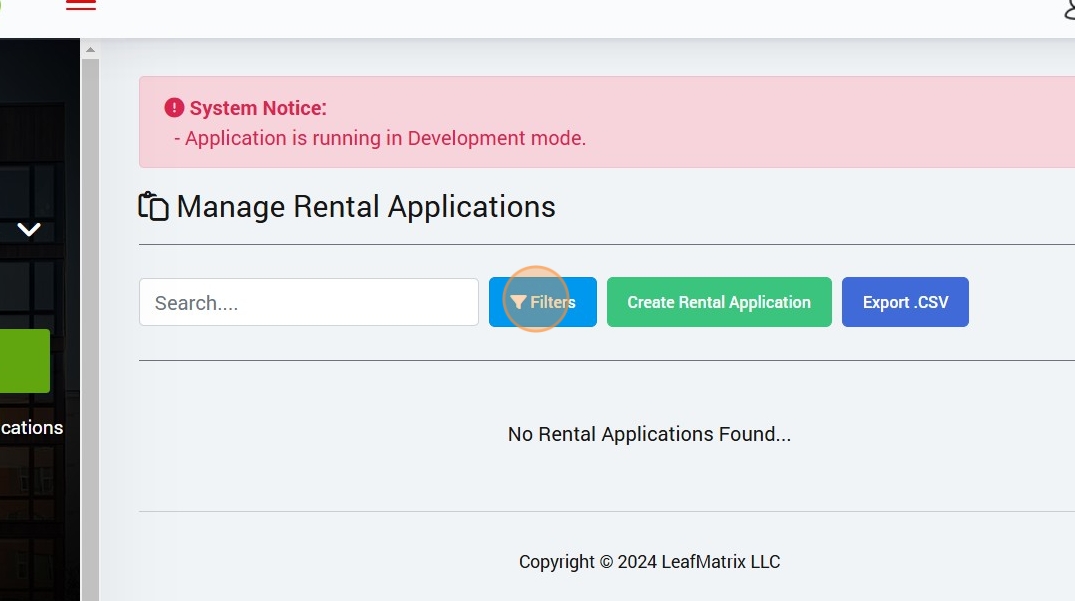
Open the Filters drawer to choose conditions. -
Select a Status
Pick the application state you want to see. Available options: Draft, Submitted, Pending Review, Incomplete, Accepted.
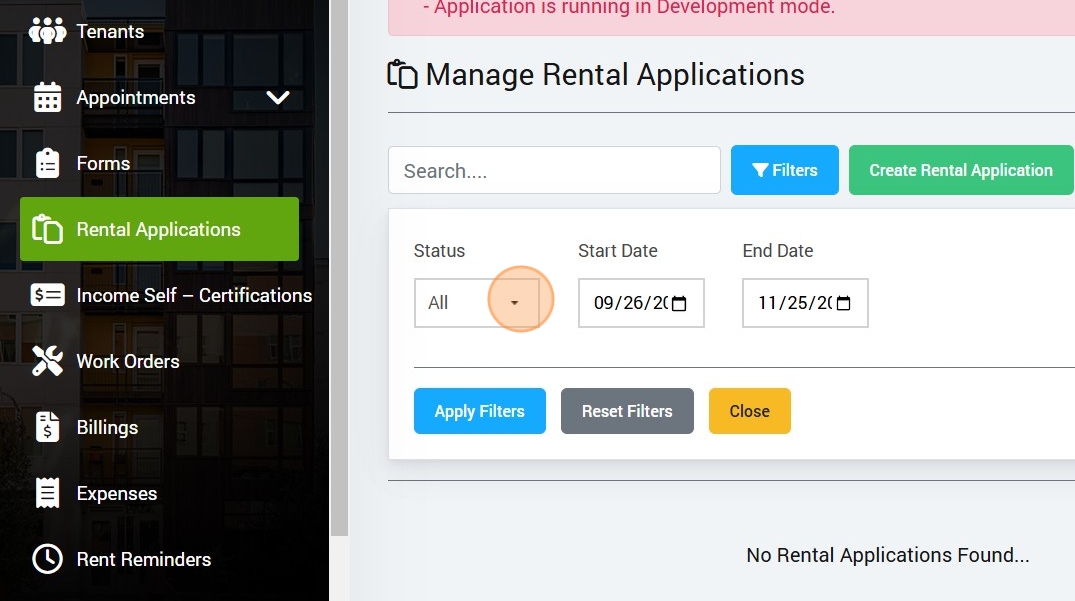
Use the Status dropdown. -
Select a Start Date
Set the beginning of your date range (optional).
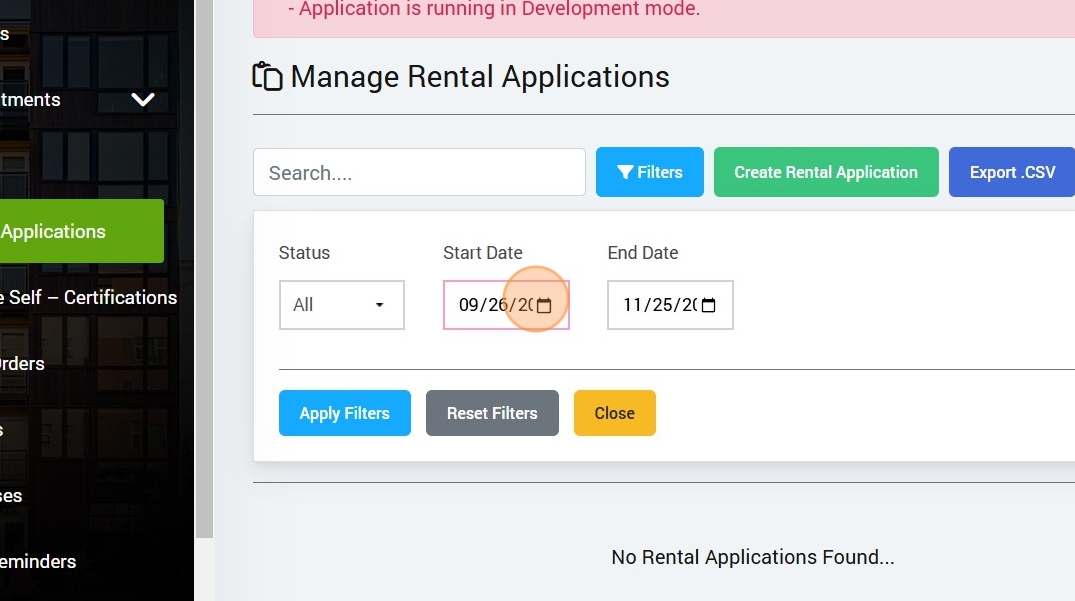
Choose the start date. -
Select an End Date
Set the end of your date range (optional).
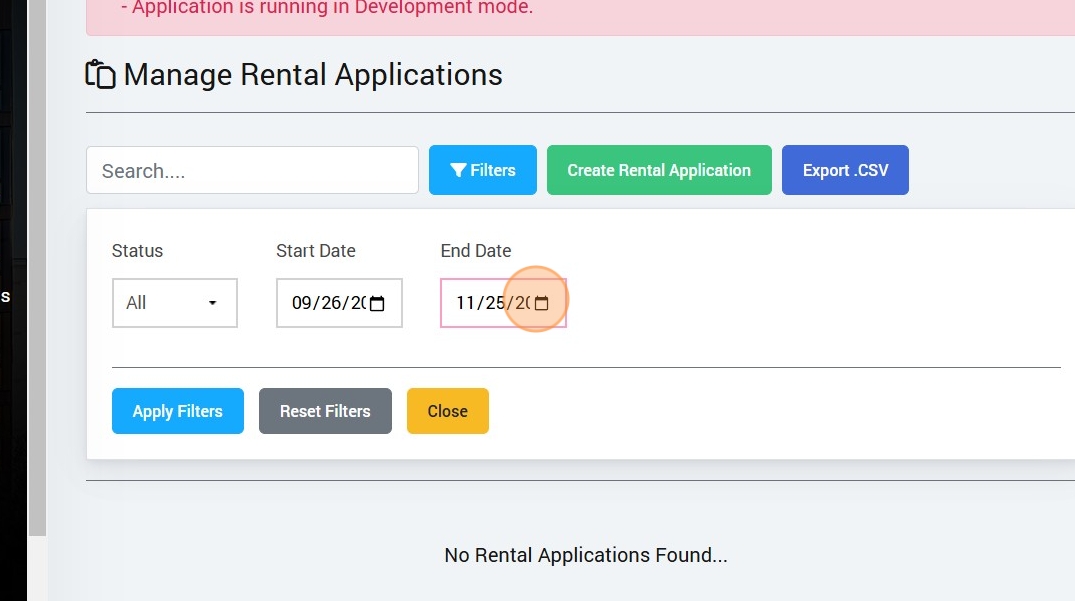
Choose the end date. -
Click Apply Filters
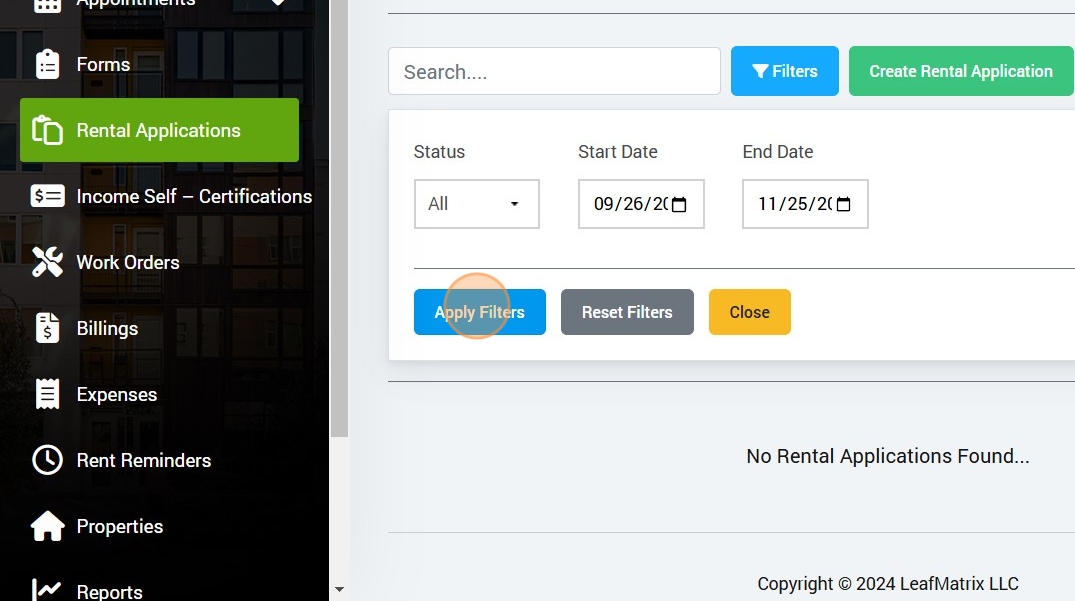
Apply your selections to refresh the results.
How to Export Rental Applications as CSV
Download a CSV of rental applications from SyncroIQ for reporting or analysis in Excel/Google Sheets.
-
Open the sidebar navigation menu
Make sure the left sidebar is visible after you sign in.
-
Click Rental Applications

Navigate to the “Rental Applications” page. -
Click Export .CSV
The export will download a CSV file with your visible applications.

Use the “Export .CSV” action to download the file.
Connect Square to SyncroIQ
Authorize and enable Square as a payment method inside your SyncroIQ account.
-
Open the left-hand menu
Click the menu icon if the sidebar is hidden after login.
-
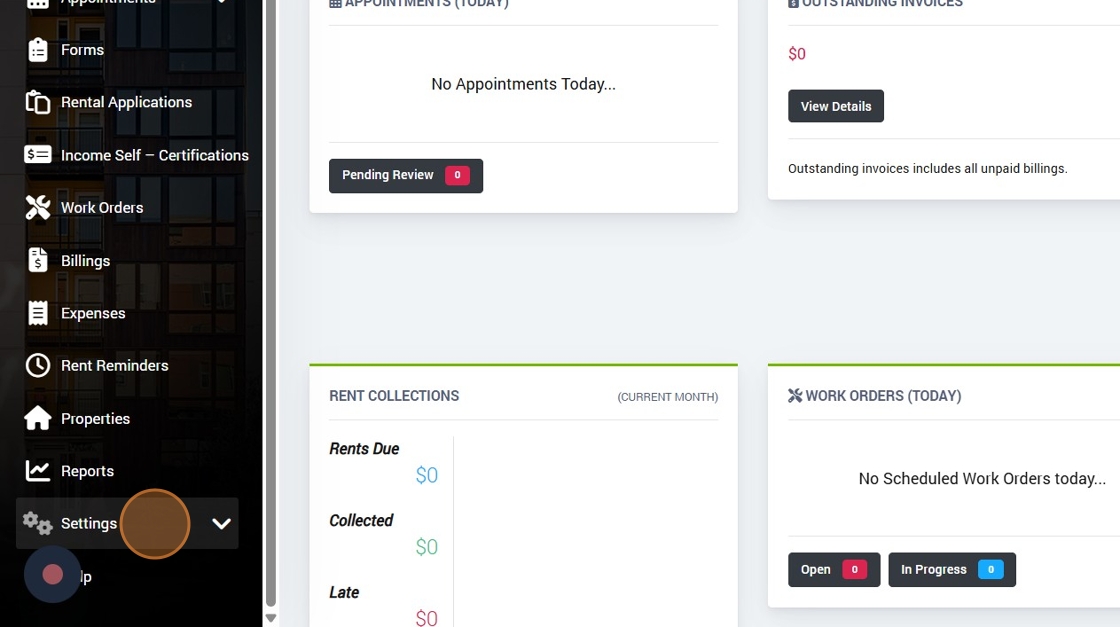
Click Settings
Open the main sidebar and go to Settings. -
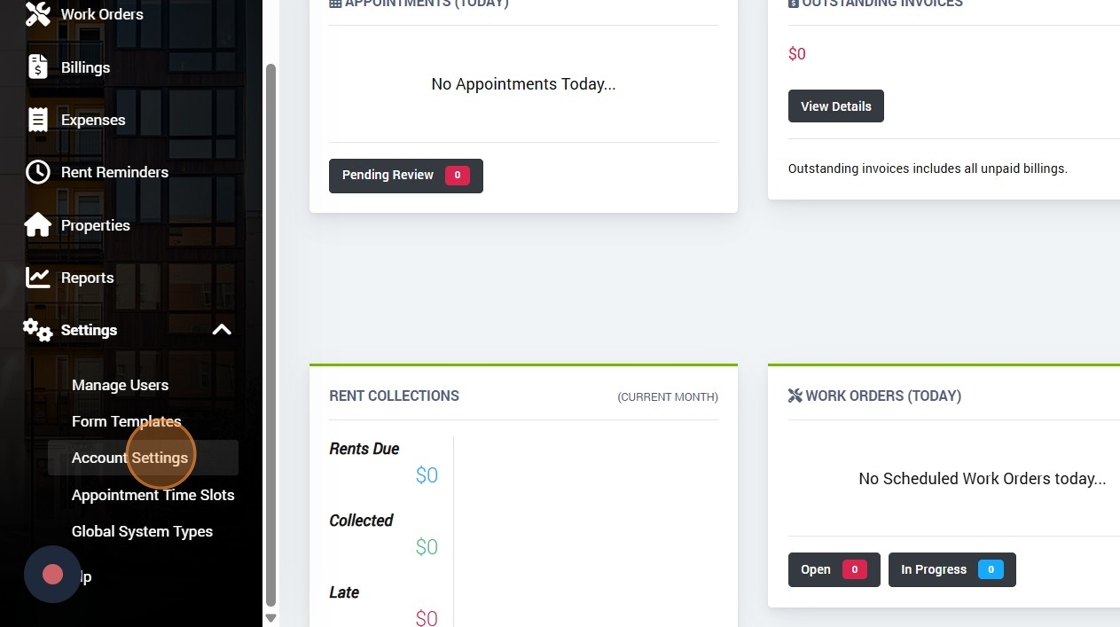
Select Account Settings

Go to “Account Settings”. -
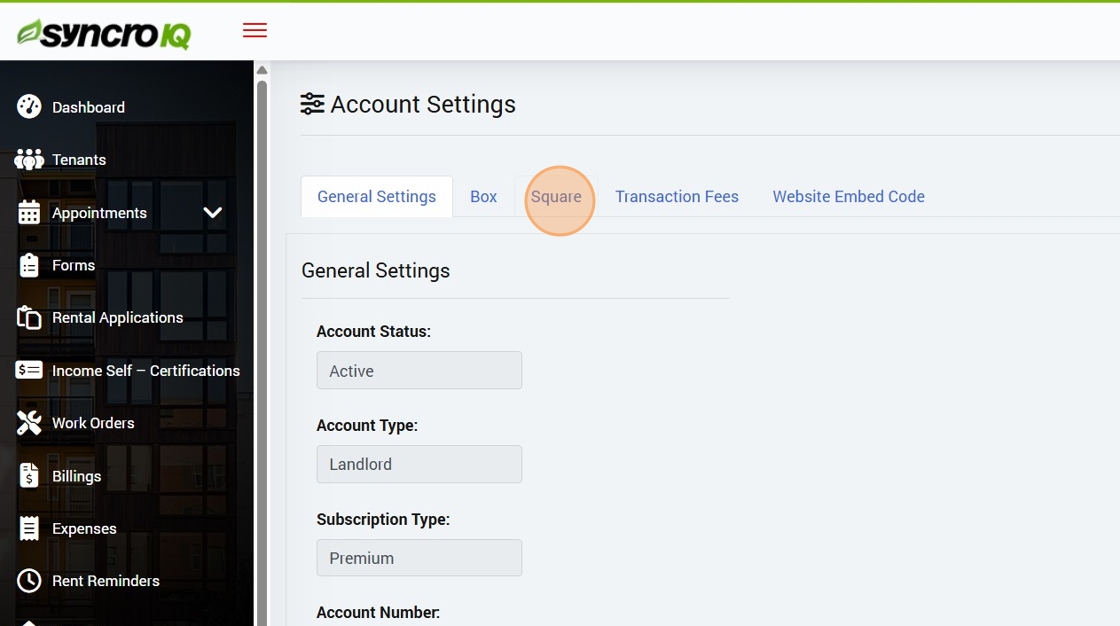
Open the Square tab

Select the “Square” tab in your account settings. -
Click Authorize Square

Start the connection flow with Square. -
Enter your Square email or phone

Sign in to your Square account. -
Enter your password and click Sign in

Complete the login and authentication step. -
Click Allow to grant access

Approve the requested permissions for SyncroIQ. -
Return to the Square tab in settings

You should now see your account as connected. -
Enable accepted payment methods
Toggle on all payment types that you want to accept (e.g. cards, wallets).

Toggle on supported methods after successful connection.
How to Disconnect Square.com from Your Account
Remove the Square integration from SyncroIQ. This stops new charges via Square from your SyncroIQ account.
-
Open the sidebar navigation menu
Sign in to SyncroIQ and make sure the left sidebar is visible.
Start on your SyncroIQ dashboard with the sidebar open. -
Click Settings
Open the main Settings area. -
Click Account Settings
Navigate to your account-level settings. -
Open the Square tab
Select the Square integration panel. -
Click Disconnect Square
Confirm the action if prompted. This disconnects Square from SyncroIQ.

Use the Disconnect Square action to remove the connection. -
Done! Square.com is disconnected
You’ve removed Square from your SyncroIQ account.
-
Important: fully revoke access in Square
To completely remove SyncroIQ from your Square account (app permissions), follow Square’s guide:
Connect Box.com to SyncroIQ Account
This guide provides a straightforward process for connecting your Box Account to SyncroIQ to request signatures.
-
Sign in and open the sidebar navigation menu
Sign into your SyncroIQ account and make sure the left sidebar is visible.
Start from your SyncroIQ dashboard. -
Click Settings

Open the main Settings area. -
Click Account Settings

Navigate to your account-level settings. -
Open the Box tab

Select the Box integration panel. -
Click Authorize Box
This begins the authorization with Box.

Use the Authorize Box action to continue. -
Enter your Email Address and Password

Log in to your Box account to proceed. -
Click Authorize

Authorize SyncroIQ to connect with Box. -
Optional: Enter your 2FA code
If 2-Factor Authentication is enabled on your Box account, enter the code from your authenticator app.

Enter the authentication code if prompted. -
Click Submit

Submit to finish the Box sign-in flow. -
Click Grant Access to Box
Approve the final permission screen so SyncroIQ can use Box for signatures.

Grant access to complete the connection.
How to Disconnect Box.com from Your Account
Remove the Box integration from SyncroIQ. This stops any further Box-based actions from your SyncroIQ account.
-
Sign in and open the sidebar navigation menu
Sign into your SyncroIQ account and make sure the left sidebar is visible.

Start from your SyncroIQ dashboard. -
Click Settings

Open the main Settings area. -
Click Account Settings

Navigate to your account-level settings. -
Open the Box tab

Select the Box integration panel. -
Click Disconnect Box
Confirm the action if prompted. This disconnects Box from SyncroIQ.

Use the Disconnect Box action to remove the connection. -
Done! Box.com is disconnected
You’ve removed Box from your SyncroIQ account.
-
Important: fully revoke access in Box
To completely remove SyncroIQ from your Box account (app permissions), open your Box account settings, go to Apps, find SyncroIQ, and revoke its access.
Create New Tenant
Add a new tenant to your SyncroIQ account by filling out the tenant details and confirming creation.
-
Open the sidebar navigation menu
Sign in to SyncroIQ and make sure the left sidebar is visible.
-
Click Tenants

Open the Tenants area. -
Click Create Tenant

Start a new tenant record. -
Enter tenant details
Fill in the required fields for the new tenant.
-
Add first and last name

Provide the tenant’s legal name. -
Enter personal email

Use a valid email the tenant can access. -
Set User Type to Tenant
Tip: You can choose to send a welcome email.

Choose the correct user type. -
Click Create

Submit the form to create the tenant. -
Click OK to confirm

Confirm the action. -
Done! The tenant is created
You’ll see the new tenant in your Tenants list.
How to Create and Navigate Work Orders
Create a Work Order in SyncroIQ and review scheduling, priority, expenses, billings, documents, and notes.
-
Go to the sidebar navigation menu
Open your SyncroIQ portal and make sure the left sidebar is visible.
-
Click Work Orders

Open the Work Orders area from the left menu. -
Click Create Work Order

Start a new Work Order. -
Select a Work Order Type
Available types: Resident, Inspection, Extermination, Move Out Inspection, Annual Inspection.

Pick the appropriate type for the request. -
Select a Tenant/Resident

Choose the resident related to this Work Order. -
Choose who to Assign the Work Order to

Assign internal staff or external vendor. -
Decide on Access Permission
Specify if personnel can access the space when the tenant isn’t present.

Set access if the tenant won’t be home. -
Enter a Subject

Provide a concise summary of the issue. -
Select Problem Location

Identify the affected area. -
Select Problem Type

Choose the category that best fits. -
Select the specific Problem

Select the exact issue. -
Add a Description (optional)

Provide extra context or specifics. -
Select a Priority level

Choose urgency for the task. -
Click Scheduled Date to pick a day

Choose the maintenance date. -
Set the Hour

Pick the appointment hour. -
Select the Minute

Adjust the exact minutes. -
Choose AM/PM

Set the time period. -
Click Create

Create the Work Order with your selections. -
Verify all Work Order Information

Confirm summary, schedule, and assignment. -
Verify Expenses

Review any costs captured. -
Verify Billings

Confirm billing items and totals. -
Verify Documents

Ensure any files are uploaded and correct. -
Add additional Notes (optional)

Record any follow-ups or updates. -
Click Edit Work Order to make changes

Adjust the Work Order as needed.
How to Filter Work Orders
Use SyncroIQ’s filters to narrow Work Orders by priority, type, problem, status, related user, and date range.
-
Go to the sidebar navigation menu
Open your SyncroIQ dashboard and make sure the left sidebar is visible.
-
Click Work Orders

Open the Work Orders section from the sidebar. -
Click Filters

Open the filtering panel. -
Select a Priority level

Choose the urgency of work orders to display. -
Tip: available Work Order Types
Resident, Inspection, Extermination, Move Out Inspection, and Annual Inspection are the options for Work Order Types.
-
Open the Type dropdown

Open the list of Work Order types. -
Select a Problem Type

Filter by the specific issue category. -
Select a Status

Limit results to a lifecycle state (e.g., Open, In Progress). -
Select a Related User

Filter by assignee or related person. -
Pick a From Date

Choose the start of your date range. -
Pick a To Date

Choose the end of your date range. -
Click Apply Filter

Apply your selections to update the Work Orders list. -
Done! Your Work Orders are filtered
The table now shows only the items matching your criteria.
How to Export Work Orders as CSV
Download your Work Orders table from SyncroIQ as a CSV file for use in Excel, Numbers, or Google Sheets.
-
Go to the sidebar navigation menu
Open your SyncroIQ dashboard and make sure the left sidebar is visible.
-
Click Work Orders

Open the Work Orders section from the sidebar. -
Click Export .CSV

Download the current Work Orders table as a CSV file. -
Done! Your CSV is downloaded
Your browser will save a
.csvfile that you can open in your spreadsheet app.

An intelligent all-in-one platform that simplifies property management for Landlords, Property Managers, and Housing Authorities.
Quick Links
Contact Us
For general inquiries:
[email protected]
For support requests:
[email protected]
If you want to talk with one of our team members or support staff, feel free to give us a call 1-888-632-4751 ext.3
Legal
© LeafMatrix LLC 2026 All Rights Reserved.